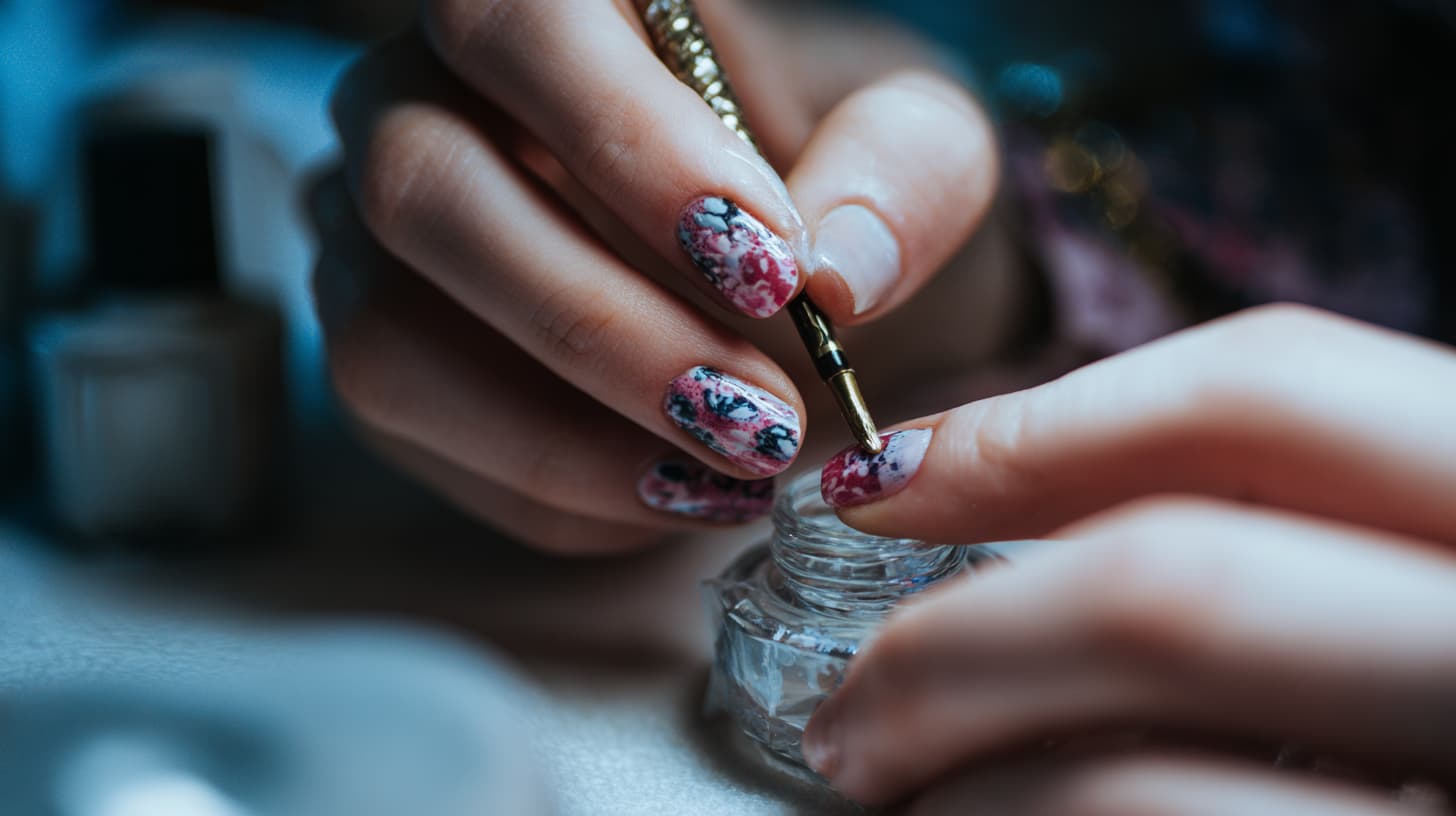
Gone are the days when salon-perfect nails required an expensive appointment. With a little creativity, a few tools, and some patience, you can recreate gorgeous, fun nail designs right from the comfort of your home.
Whether you’re new to nail art or looking for beginner-friendly inspiration, these DIY manicure ideas are easy to follow and give seriously stylish results.
Ready to treat yourself to a home manicure? Here are 15 easy nail designs to try at home, each one cute, trendy, and totally doable.
1. Polka Dots

Hover on images and discover how pinning can transform your collection of favorites!
Tools needed: Dotting tool or bobby pin
This beginner-friendly design never goes out of style. Paint your nails with a solid base color and add polka dots using a dotting tool (or the rounded tip of a bobby pin) dipped in a contrasting polish. Keep it monochrome or go colorful!
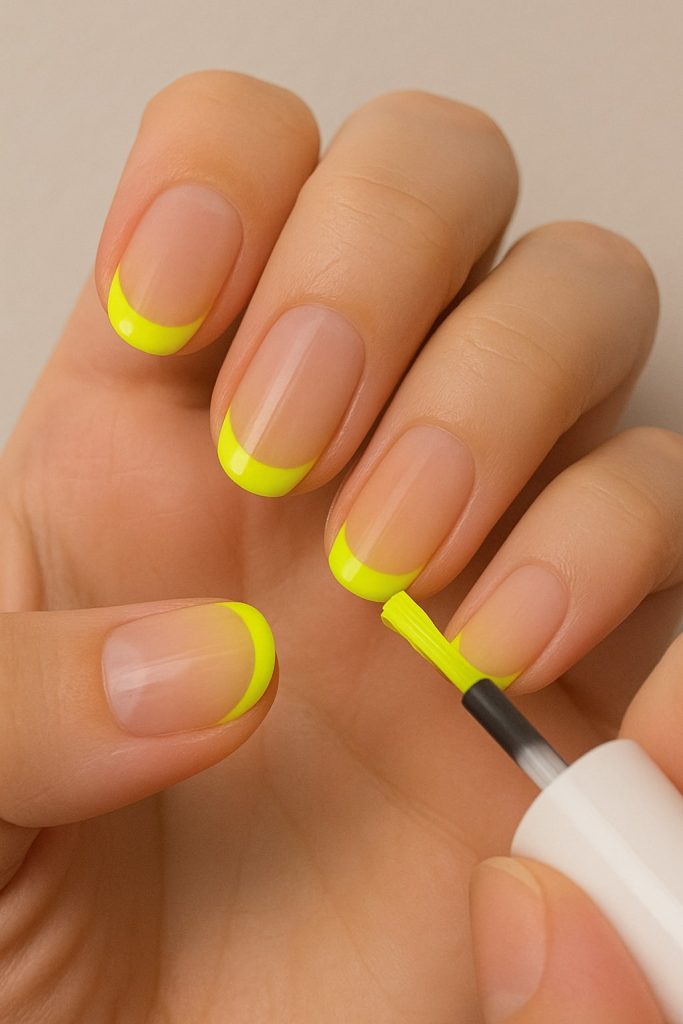
2. French Tips with a Twist
Hover on images and discover how pinning can transform your collection of favorites!
Tools needed: Nail tape or steady hand
Instead of the classic white tip, try using bold colors—like baby blue, gold, or even neon. You can use nail guides or tape to keep the edges clean. Want to mix it up? Try diagonal or double-tipped French designs.
3. Glitter Fade (Gradient Glitter)

Hover on images and discover how pinning can transform your collection of favorites!
Tools needed: Cosmetic sponge
Start with a base color, then use a sponge to dab glitter polish near the tip, fading it toward the center of the nail. It’s an effortless way to create a chic ombré effect.
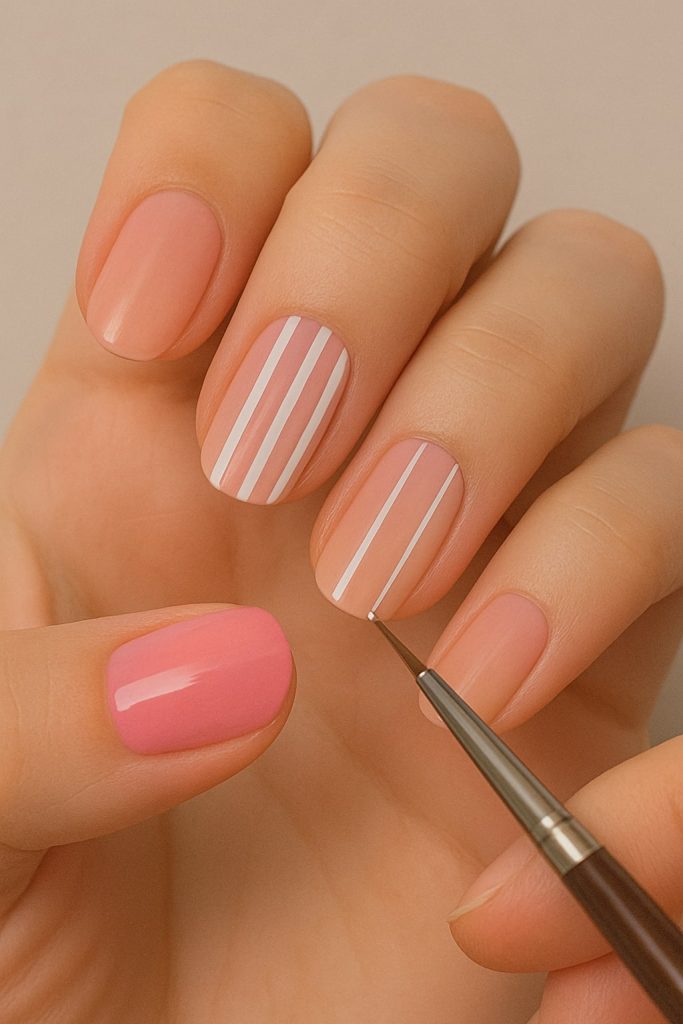
4. Minimalist Line Art
Hover on images and discover how pinning can transform your collection of favorites!
Tools needed: Thin nail art brush or striping tape
Minimalist designs like vertical lines, small dots, or single stripes look modern and clean. Use a thin brush or nail tape for precision, and stick to neutral shades or experiment with color blocking. If you love pared-back, elegant styles, our Simple nail ideas showcase a variety of minimalist looks that are perfect for any occasion.
5. Negative Space Designs
Hover on images and discover how pinning can transform your collection of favorites!
Tools needed: Nail tape or stickers
Negative space nails are all about leaving part of the nail bare. Use nail tape to create geometric shapes or lines and paint over them—then peel off the tape for crisp, cool patterns.
6. Accent Nail

Hover on images and discover how pinning can transform your collection of favorites!
Tools needed: Optional nail art (glitter, foil, stickers)
Keep all your nails one color, but choose one or two accent nails for something extra—glitter, rhinestones, foil, or nail decals. It’s simple and instantly elevates your look.
7. Dry Brush Effect

Hover on images and discover how pinning can transform your collection of favorites!
Tools needed: Nail polish brush
Wipe off most of the polish from the brush and lightly drag it across your nails. Layer different colors for a grungy, artistic effect. It’s messy on purpose—and very forgiving.
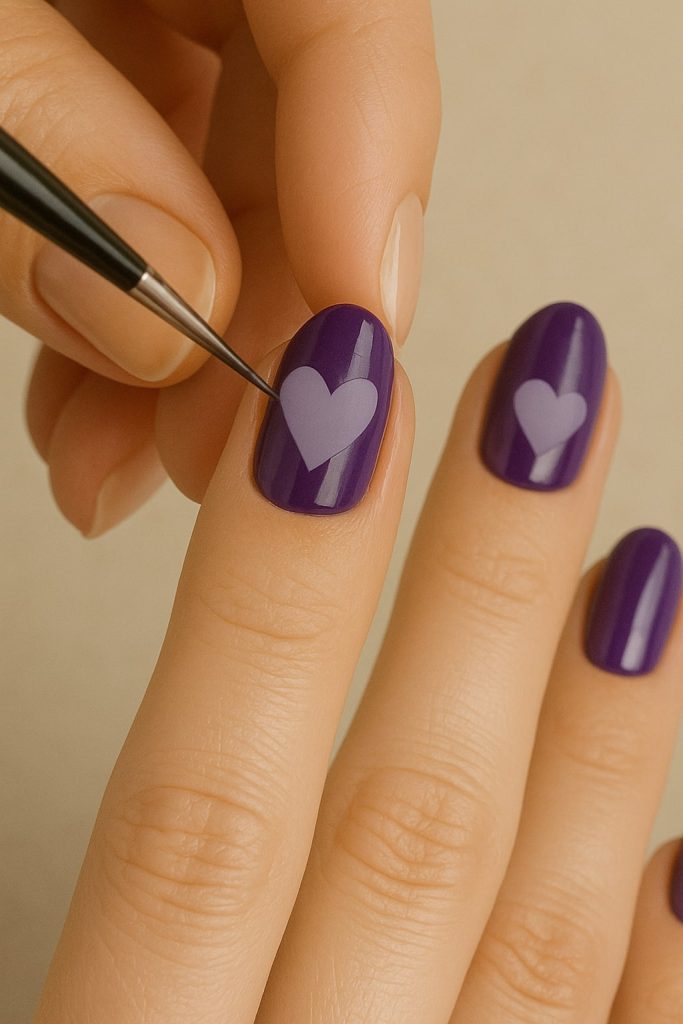
8. Heart Tips
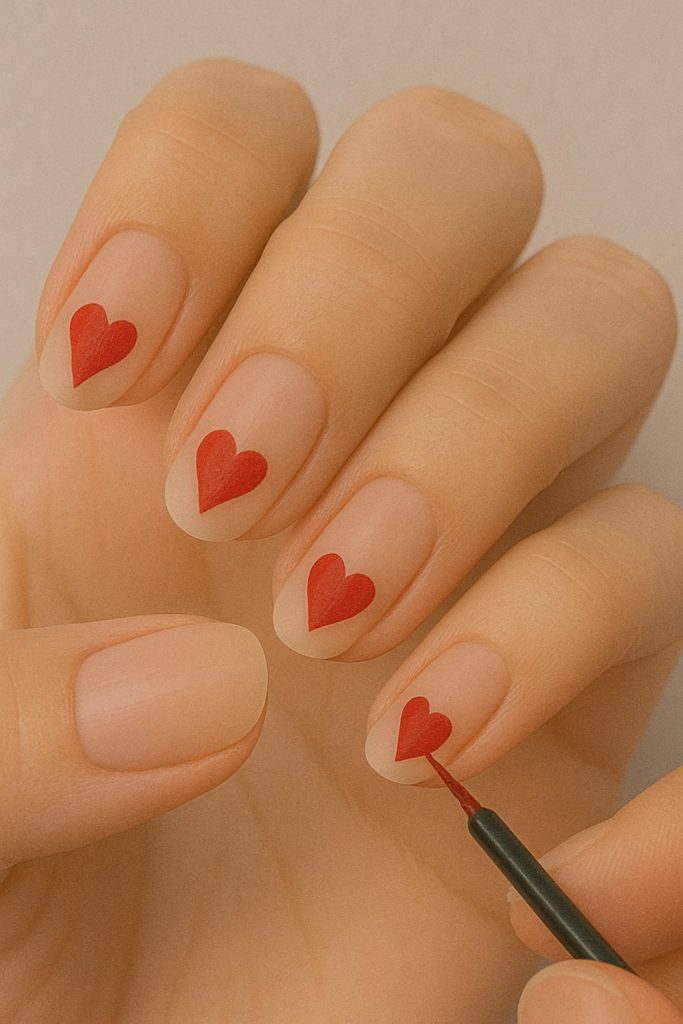
Hover on images and discover how pinning can transform your collection of favorites!
Tools needed: Dotting tool or small brush
Paint a heart at the tip of each nail using two small dots, then pull the polish down into a V shape. Cute, easy, and perfect for date night or Valentine’s Day. If you enjoy fun and simple designs like this, our Cute easy nails feature plenty of charming ideas you can try at home.
9. Floral Nail Art
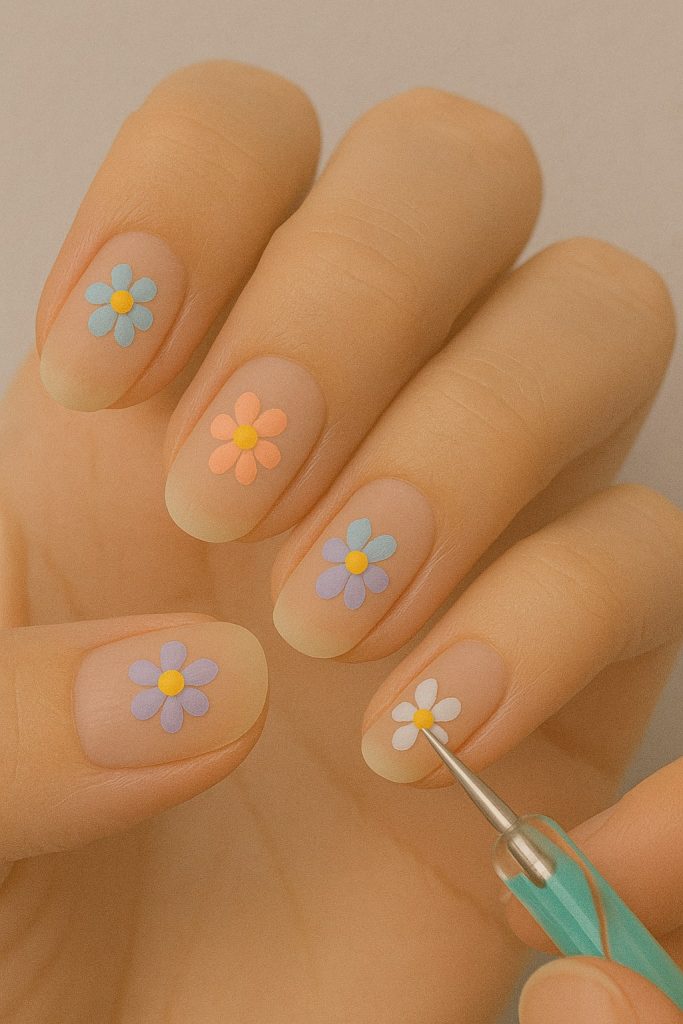
Hover on images and discover how pinning can transform your collection of favorites!
Tools needed: Dotting tool or toothpick
Make tiny flowers using 5 dots for petals and a different color for the center. Use pastel tones for a spring vibe or go bold for a more eye-catching effect. A few flowers per nail are enough to make it pop.
10. Marble Effect

Hover on images and discover how pinning can transform your collection of favorites!
Tools needed: Plastic wrap or detail brush
Swirl white and gray polish together using a detail brush or dab a crumpled plastic wrap dipped in polish onto your nails. Seal with a top coat for a stunning marble-like finish.
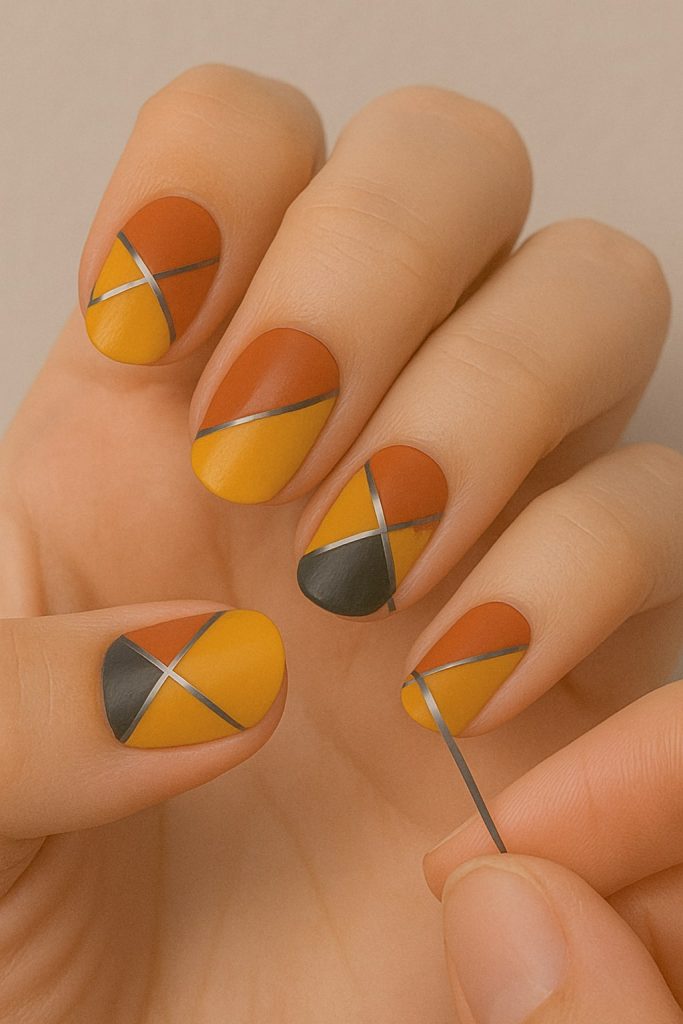
11. Two-Tone Split

Hover on images and discover how pinning can transform your collection of favorites!
Tools needed: Nail tape or freehand
Paint half your nail in one color and the other in a contrasting tone. Use tape for a straight split or get creative with diagonal and wavy lines.
12. Striping Tape Designs

Hover on images and discover how pinning can transform your collection of favorites!
Tools needed: Striping tape
Use thin metallic striping tape to create sleek lines, grids, or frames on your nails. You can also paint over it and peel it off for clean line designs.
13. Ombre Nails with a Sponge
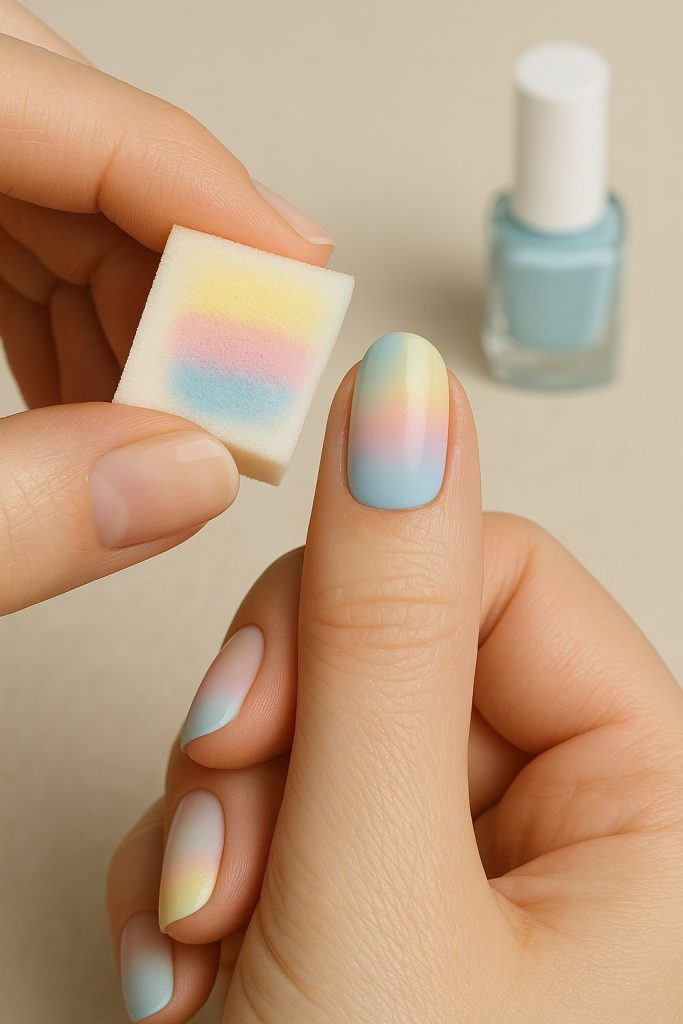
Hover on images and discover how pinning can transform your collection of favorites!
Tools needed: Cosmetic sponge
Blend two or three colors directly onto a sponge and dab onto your nails to create a smooth gradient. It might take a few layers, but the effect is beautiful and surprisingly easy.
14. Abstract Swirls
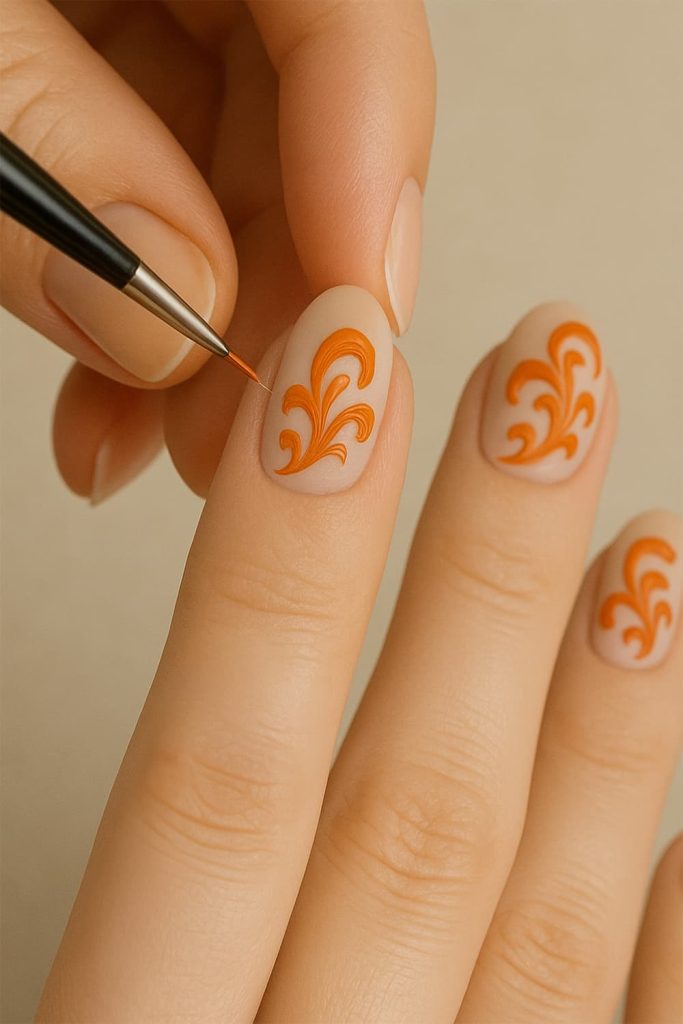
Hover on images and discover how pinning can transform your collection of favorites!
Tools needed: Thin brush or nail art pen
Abstract designs are forgiving and super trendy. Use a thin brush to paint swirls or loops with a contrasting color over a neutral base. It’s like modern art for your fingertips.
15. Matte vs. Glossy Combo
Hover on images and discover how pinning can transform your collection of favorites!
Tools needed: Matte top coat
Paint your nails with a glossy finish, then use matte top coat to draw designs like stripes, dots, or shapes. The contrast between finishes is subtle but very chic.
Tips for a Perfect DIY Manicure
- Always prep your nails: Clean, shape, and buff before applying polish.
- Use a base coat: It protects your nails and helps color last longer.
- Seal with a top coat: This adds shine (or matte!) and helps prevent chipping.
- Clean edges with a brush: Dip a flat brush in nail polish remover to clean up mistakes around the cuticle.
- Practice patience: Let each layer dry completely to avoid smudging.
Why Easy Nail Designs Are Perfect for At-Home Manicures
You don’t need a salon or expensive tools to create beautiful nails at home. With a little inspiration and a few basic supplies, you can experiment with fun, creative designs that match your mood, outfit, or even the season.
These easy nail ideas show that anyone can master DIY nail art with just a bit of time and practice. If you want more inspiration, check out our Nail design collection for a variety of styles that suit every occasion and skill level.
So gather your polishes, pick a favorite design, and treat yourself to a relaxing (and stylish!) at-home manicure.